Replacing a blown capacitor on a Polaroid 8x10 processor (81-01, 81-01, 81-12 or 81-22)
Polaroid processors came in a few varieties. First came Model 81-01 using film holder 81-05 without the need for a tray, but most of us are familiar with the model 81-02 processor, the latter requiring tray 81-09 and model 81-06 film holders.
Both 81-01 and 81-02 processors are designed for the US power grid at 115 VAC. They are painted blue. Model 81-12 appeared later on the market and is painted white. and typically has a crank to drive the rollers in case there's no power. All model 81-22 processors I've encountered are for the European grid at 220-240VAC.
Most of the available second hand processor stock is 30+ years old and will function when properly cleaned and maintained. One weak point though in the original design is the use of an oil filled capacitor as motor start/run capacitorm these tend to explode at the end of their useful life or after a decade or so of no activity. The oil degrades over time and shorts the foil inside, so when this happens, expect a hissing sound, smoke as coming from a smoke machine, a blown fuse and a lot of confetti and oil in the processor. An image of the capacitor in subject prior to explosion. Yes, I tend to replace them prior to using old processor units.


If you just witnessed an oil-filled capacitor failing catastrophically, this will cost you an hour of cleaning gunk, on the inside of the machine. There are plenty of online records of this happening with the older processors. To be fair to the Polaroid engineers, they recognized the issue and the processors of the 2005-2006 timeframe no longer have an oil-filled motor start capacitor.
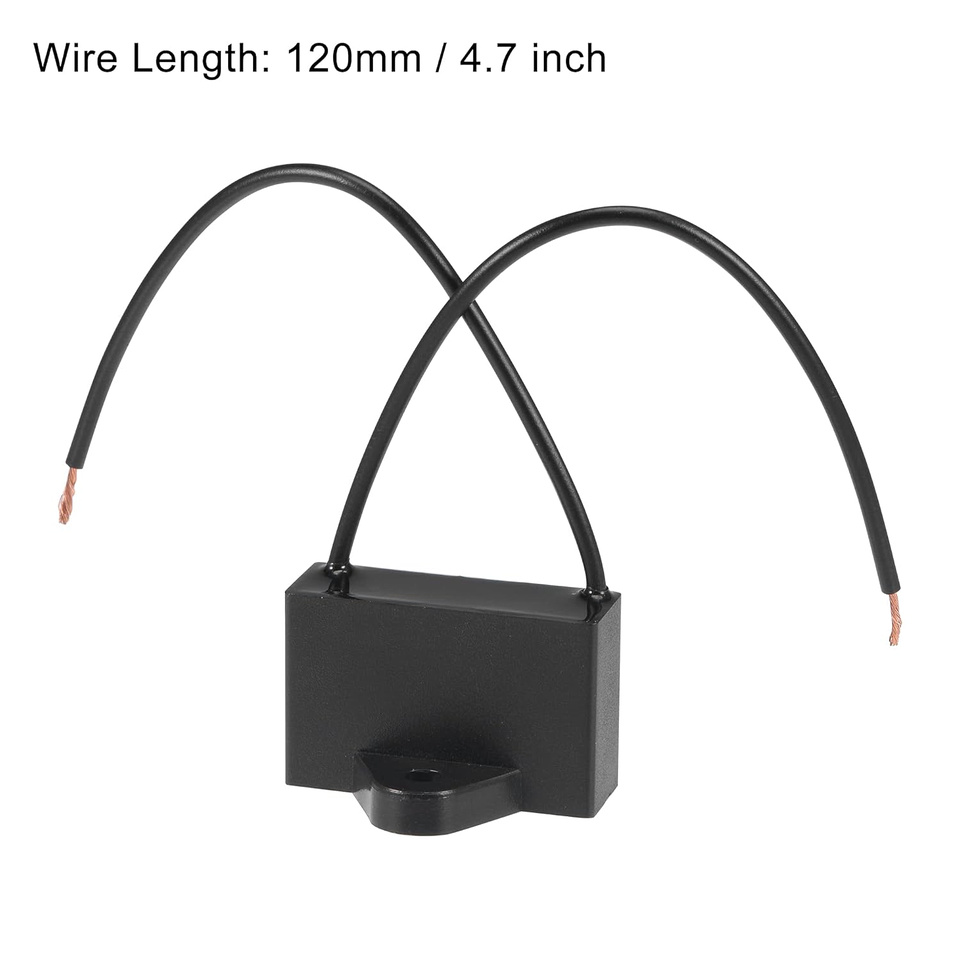
The original oil-filled capacitor was an Aerovox 0.8µF 220V 60 Hz. Any capacitor designed as a motor start/run capacitor with a rating of 0.8 to 1 µF and rated for 250 VAC (US grid) or 450 VAC (European grid) will work. These capacitors are commonly use for small AC motors, as in ceiling fans and other small appliances.
Below a front and rear-view of what these capacitors typically look like.

 Above front view of a typical motor start/run film capacitor, in this case a 0.8µF, 250 VAC variety with the rear view below. It is important to note the tab with hole at the bottom as this allows for an easy and secure installation in the processor.


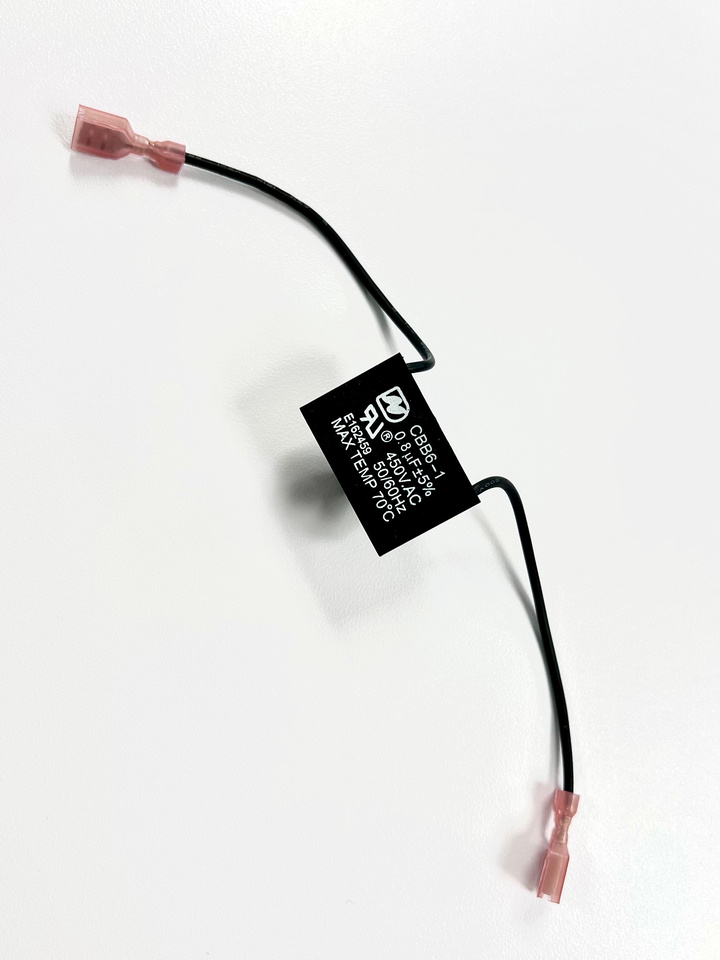
The old capacitor is connected to a terminal block using 1/4" FASTON connectors. These are blade connectors that are widely used in electronic and electrical equipment because of their reliability. They come in a variety of sizes, but in this case we need the 1/4" variety. The red colored ones are sized correctly for the wire gauge used on the capacitors. They can be found in the typical home improvement store.
When installed and crimped properly, your capacitor assembly will look like the image below. (This is incidentally a different brand 450 VAC variety capacitor for a processor model 81-22 repair.)


You are now ready to unplug the old capacitor wires from the terminal block and plug the replacement capacitor in at the same locations. There is no need to observe any type of polarity. As for securing the capacitor to the chassis, the wires are typically too short to use the old capacitor location. The easy way out is to unscrew one of the terminal block connectors and secure the capacitor with the same screw at that location. This has worked in all processors I upgraded so far and saves extending the wire.


Of course, for those with a soldering iron and the necessary skills, it is equally straightforward to use the old capacitor wires and just solder a new capacitor in while using heatshrink tube to protect the splice from shorting out or touching chassis. (Safety first.)
Knowing the propensity for these old oil-filled capacitors to fail after reinstating these processors for use after a decade or so of neglect, it is a much faster process to preemptively replace those capacitors as it saves you the clean up of the silver confetti and somewhat toxic oil in the innards of your machine.
Make sure to replace the equally blown fuse with the new fuse of the same rating for continued fire protection in case of failure.
I hope this description takes the mystery our for those new to the subject matter.
Cheers !
Rudi A.